A process take some time to get finished but every second is important in industry. We can't even waste 1 sec extra on processing OR we can't stop the process before proper finishing. Process should be stop at desired final stage. That's why we need timers that's continuously runs with the process; whenever process reaches its final stage it finishes the process.
For industrial process, We can use timers anywhere according to our need but we must know how these timers works.
In this post, We are going to discuss about the timer (XT56) made by selec.
- Its overall dimensions
- Its specifications
- Terminal connections
- DIP switch setting
- Applications
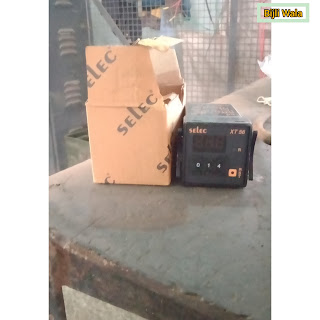
SELEC TIMER XT56
This small size 48*48(mm) timer comes with 3 digits push wheel switches. Operating voltage is 90 to 270V AC/DC, AC-50/60 hz. It contains 2 changeover relays.
 |
| Timer XT56 by SELEC |
Overall dimensions
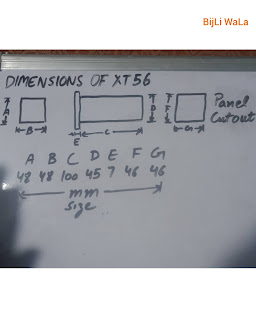
This timer is compact small size. All the dimensions of timer shown in image below:
 |
| Dimensions(mm) of timer XT-56 | selec |
Specifications
Display
: 3 digits, 0.3" Height, Red LED
Set point
: Single set point
Supply
: 90 to 270V AC/DC, AC: 50 or 60 hz
Delay modes
: On delay/ Interval
There are two modes in this timer:
1st is on delay which means relays operates after the set time as name suggests.
2nd is interval mode which means relay starts instantly as it gets the start command & remains operated for set time.
Time ranges
: 9.99, 99.9, 999 sec.
: 99.9, 999 min.
: 99.9 hr.
Time Setting
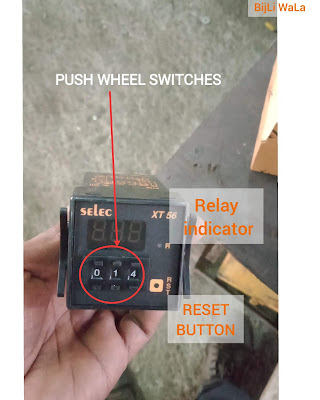
: By push wheel switches
Accuracy
: plus-minus 0.05%
Start Input
: Pulse Start
Reset
There are 3 options to reset the timer.
1. Front panel reset
A small reset button is provided in front of the timer. Above the reset button relay indicator is provided which glows when relay gets operated.
2. Remote reset
This reset works from terminals. Just short the terminal 9 with 10.
3. On power interruption
When power supply to timer breaks; timer automatically get reset.
 |
| Timer XT-56 by selec |
Reset time
: Less than 100 msec
Count Direction
: Down
LED Indication
: Relay status
Output
: 2 C/O(DPDT)
Relay Rating
: 5A@ 230VAC/24VDC
Mounting
: Panel mounting
Housing
CE marked products : Flame retardant plastic
Non CE products :ABS plastic
Temperature
Operating : 0 to 50°C
Storage : -5 to 55°C
Humidity
: 95%RH
Weight (gm)
: 170
Terminal connections
- There are two power supply terminals 6,7 . Timer works on both AC & DC from 90 to 270 Volts.
- There are two relays, each relay constitutes three terminals 1st is common, 2nd is NC & 3rd is NO.
- Terminals 3,4,5 constitutes relays 1 where terminal 4 is common,3 is NO & 5 is NC.
- Terminals 1,2,11 constitutes relay 2 where terminal 1 is common, 11 is NO & 2 is NC.
- Now, there are terminals to start & reset the timer. Terminal no.12 is start & No.9 is reset terminal.
- To start, we need to connect terminal 10 GND to terminal12 to start.
- To reset, we need to connect terminal 10GND to terminal 9 to reset.

Terminal connections timer XT56 Selec
Timer DIP switch setting
This timer is provided with only 3 wheel switches. With these three wheel switches; time digits can be set.
To change the timer mode & time units; DIP switch mode is provided. In this DIP switch, there are 4 switches 1,2,3 & 4.
 |
| DIP switch setting (selec XT56-N) with switch 3 in ON position |
1st switch is used to set the 'MODE' & remaining 3 switches are used to set the 'time units'.
SWITCH 1-
- If switch 1 is OFF, timer will work as ON delay timer.
- If switch 1 is ON timer will work as OFF delay timer or interval timer.
SWITCH 2,3&4-
Combination of these three switches used to set time units & time resolution.
In the image above, 3rd switch is ON & remaining switches are OFF.
1st is OFF: It means it is working as ON delay timer. Timer will operate the relay after the set time that's Why ON delay timer.
Rest 3 switches are OFF, That means timer units are seconds with no decimal point.
 |
| DIP switch setting for modes & time units for selec XT56-N |
APPLICATIONS
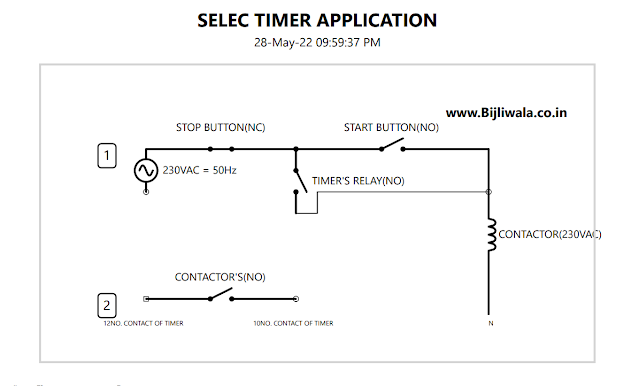
To understand the practical application of the Timer; we are taking a case where we have 3phase 3.7 kW Monoblock pump which is running on DOL Starter. Once it started, it must run for 30 minutes. After 30 minutes, pump needed to be stopped & run again only when we start the pump again.
Every time pump must run for 30 minutes!
1. First set the DIP switch setting
SW1, SW2, SW3, SW4 = ON, ON, OFF, OFF
SW1(ON)- Timer will work in Interval mode.
SW2(ON), SW3(OFF), SW4(OFF)- Time units will be in minutes with no decimal point.
Set the wheel switch at 030
2. Circuit wiring
 |
| Wiring for timer Application |
The circuit is very simple. DOL STARTER remains the same; we are just passing the hold signal through NO of timer's relay. Contactor will hold until feed time finished.(shown in above image 1)
We also need to provide start signal to the controller which can be provided by just shorting the two terminals 10&12 of the timer.(shown in above image 2)
Hope! You like the post. If you have any doubt, suggestion or query. Please do comments.
